Kimono Duster
I used Simplicity's Cardigan pattern # 8377: link here
But I hacked it a lot more than the pattern suggests:
* I used the medium length (the view with the pleat in the back) but cut it much longer as I wanted it close to floor length.
* I did not cut a set-in sleeve - I cut a kimono style sleeve extended from the shoulder - so I ended up with 2 pattern pieces - front and back.
* I rounded the bodice front more - just because I wanted to! LOL!
* Oh! And I rounded the hem as well!
* I finished the side seams - (including inside the sleeves) with French seams, as I really didn't want any seams to show.
* I did not use the facing - because I did not want the weight of it - I really wanted this Modal Rayon fabric to remain light and airy. Instead, after much thought about the finishing and color, I opted for black packaged bias binding - I am sew, sew glad I did! I love the outcome!
Then I simply paired it with a re-fashioned men's crew neck t-shirt, straight leg jeans and black heels. No, No, not high heels, just heels! 😄 More on the t-shirt in a later blog! Isn't it fun to be able to create and recreate clothing! 💓

I really do like the pleat in the back!
And I love the flowiness of this completed duster! I will definitely make a few more!
Photo Creds: My Granddaughter, Charlysse: Enchanted Photos
Follow her on Instagram
Now...on to the binding!
I used 2 packages of 1/2 inch double fold bias binding. After joining the 2 pieces from the packages together, I simply inserted the edge of the duster inside the binding and used a straight stitch. I started with about a 10 inch tail...you will need this when approaching the end.
Take a close at your packaged binding. You will see that one side is slightly wider than the other. I placed the wider side on the wrong side and stitched from the right side. This ensures that the bottom of the binding will be "caught" when stitching. Take a peek at the wrong side periodically to ensure you are stitching both sides.

When I get about 6 to 10 inches from the end, I stop and overlap the 2 ends. The key is to overlap them the same width as the binding. So if your binding is a total of 2. 5 inches wide (when opened), you will overlap the the 2 ends 2.5 inches
The next step is to double check your measurements, take a deep breath and cut off the excess. Or you can choose not to breathe and leave the excess for insurance. It's really up to you! 😊
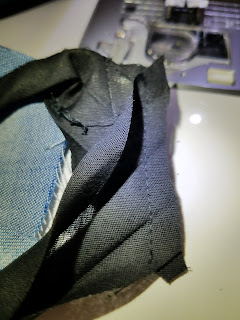
 Join the 2 pieces in a "T" formation and stitch at a 90 degree angle. Joining the binding at a 90 degree angle will reduce bulk at the seams.
Notice, for this demo, I did not cut the excess...I actually had too many distractions going on that day and did not want to have to do it over.
But alas...I did cut it!
But only after I made sure I'd sewn it accurately!
Then I folded the binding over the rest of the hem and completed the stitching. I used the same steps for the sleeve hems!
I'm SEW, SEW happy with the results!
Don't forget...it's still National Sewing Month! What are you sewing?
As always, comments and questions are always welcome!


No comments:
Post a Comment