Showing posts with label ponte knit. Show all posts

Tuesday, February 5, 2019

Sew Let's Sew!

This post may contain affiliate links. This means that if you click through and make a purchase from these links, I may earn a small commission at no extra cost to you.

Sew! Let's Sew!

I am SEW excited to announce that my 3rd, Yes 3rd 
Online Sewing Course is up and running on the website!


My classes are offered as either stand-alone courses or 6 month memberships courses!  You can register for classes at any time and will have lifetime access to any course you purchase.  
For those who purchase the 6 month membership course, you will also have access to a private group where you can post pictures and ask questions!
Click here for pricing and registration!


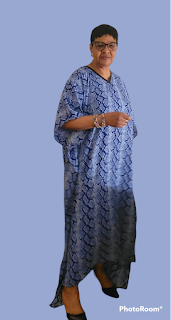
In this course I teach how to make a knit cardigan!  Cardigans are perfect all year round!
Below are some of the topics presented in this course!
  • How to preserve fabric
  • When, where and why to use interfacing
  • How to make the pockets
  • Top stitching
  • How to choose the correct stitch lengths
  • Serger tips
  • Top-stitch finishes
  • When and why to press
  • Final finishes of your knit cardigan

Check out my promotional video!  
And while you're there, check out the rest of my YouTube Channel!


You will be using a combination of your sewing machine and serger (if you have one).


Pattern layout is a tedious, but necessary and fun part off the process!


Let's get those pieces together!


Use your sewing machine and serger in tandem to create beautiful, professional looking garments!


 Celebrate your success!


Happy Endless Sewing!


Don't want to miss a blog post? Sign up for email notices.  

Tuesday, December 26, 2017

My Red Dress


I REALLY WANTED A RED DRESS!


I hadn't had a red dress in many, many years.
I've had and made red jackets and blouses, but no red dress.
I even whined about it on FaceBook!
  LOL!

Then lo and behold...I found some red Sophia Ponte knit in my stash that I'd purchased from Vogue Fabrics a few years ago! And the cutting began! I initially wanted a fit and flare dress, but I did not have enough fabric and I was determined that I would not not buy more red fabric.  This just had to work! So no fit and flare!

While cutting, I decided to use some black Telio Scuba knit for the sleeves.  The fabric was purchased from Fabric.com and was left over from the last dress I made for my daughter.

These two fabrics played nice together, both stitched well separately and together.  Most of the construction was done on my serger with 4 threads.

I used and hacked McCall's 7501. I made view A with the bell sleeves from view D. I also lowered the front and back neckline.  I've come to really like the look of lower, slightly curved back necklines. If you take a look at some of my previous makes, you will see the lower back necklines as I almost always lower them on tops and dresses...so this dress was no exception.


I ran into a problem with the sleeves!  I rarely have to shorten the sleeves of commercial patterns, but these ragland sleeves were much too long!  Of course I didn't discover it until after the sleeves were added and I'd tried it on. Yes! I do several fittings for myself!   ðŸ˜„

Then looking at the sleeves and trying the dress on a few times, I realized that I couldn't simply shorten them.  If I shortened them the 3 inches from the bottom that I needed to, I would essentially have no bell.

So I put the dress aside for a day to think about it. This allowed me time to put on my engineer's cap (aren't we all engineers in this craft?) and come up with a solution.

I decided/realized that I needed to shorten it somewhere above the bell.  So that is what I finally did.  I tried it on again and marked it for the cut at the mid bicep point. But who wants a seam in the middle of their sleeve?  That would not have worked at all. LOL!

The engineer side of my brain told me to hack the sleeves by adding a red strip of fabric at the point I'd cut the sleeve. Sew...that is exactly what I did!  And I'm pleased to say that I was excited with the result!

I finished the neckline by first stabilizing it with stay tape, then added a self binding, a narrow hem on the sleeves and a blind stitch on the hemline.


After I finished the dress, I heard about The Little Red Dress Project on Instagram.  Sew...because we all know that I love challenges, I entered my dress in the challenge.  This challenge was to bring awareness to sewing. I couldn't resist! 💕

I hope you are enjoying my sewing adventures as well as the tips and tricks that I provide here.  If so, please feel free to subscribe so that you don't miss any of my posts. Your email address will never be shared.


Let's Make and Wear a Kaftan

This post may contain affiliate links. This means that if you click through and make a purchase from these links, I may earn a small commiss...