Showing posts with label knit. Show all posts

Tuesday, January 5, 2021

Minerva ITY Knit - Wrap Dress

This post may contain affiliate links. This means that if you click through and make a purchase from these links, I may earn a small commission at no extra cost to you.


Once again I've used fabric that was gifted to me from Minerva.com in exchange for a blog post!

This ITY knit is the perfect fabric for a wrap dress...which I've never made or worn before. 
I love the print!


I chose McCall's 6884 - view C - which has been in my stash for quite a while. 


  I was never sure how this style would look on me. But once I tried it on and made a few adjustments, I loved it SEW much that I didn't want to take it off!

Adjustments were interesting! 
Because I'd never made or worn this style of dress, I wasn't sure where to start. 

In the end, I really only needed to reduce the width of the under panel.  I gradually cut it until I'd removed about 3 inches. Of course I had to try it on each time until I was happy with it. This took a while, but it was worth it.  

I'm wearing a camisole underneath so that I'd be covered - if I happened to bend over.
I'm very happy with the outcome and the fit! 


I'm wearing my Mom's pearls with it.  I think she'd love the look as much as I do!

Most of the construction was done on my serger.  All hemming was completed on my sewing machine.


As always, with ITY knits...I used a fusible knit stay tape on the shoulders, neckline, hem and sleeves.  It stabilizes those areas, which extend the life of the garments.


I used a narrow (lightening bolt or wobble) stitch to hem the sleeves and bottom of the dress.


The pattern doesn't call for it, but I added a snap to the inside to ensure that the inside panel doesn't fall below the outside...I wanted to keep the hem even...even when I'm moving.


This is now one of my favorite dresses!  
I will definitely make it again...and I'll stick to using knits for it.


Friday, March 13, 2020

Flutter Sleeves!

This post may contain affiliate links. This means that if you click through and make a purchase from these links, I may earn a small commission at no extra cost to you.

This simple top became a bit of a challenge!


I'm really not a pastel kind of girl, but I fell in love with this beautiful 
double brushed poly knit print 
at the International Houston Quilt Festival in October 2019 when I spotted it at the SoSewEnglish booth.  

There was only one bundle left, so I tucked it under my arm as I continued to shop.  I didn't even know how much yardage it was!

LOL! 

A girl's gotta do what a girl's gotta do! Right?

There was just enough for a simple top, which was perfect because that print needed to speak for itself!

I'd heard about this wonderful knit, but that was my 1st time seeing and touching it!
It is SEW soft!

  It's like wearing secret pajamas! 
It will also make wonderful luxurious feeling pajamas!


I used my TNT (Tried and True) pattern - Butterick 5954.  It's out of print now, but I found it here.  


You can see from some of my markings that I've hacked and used it multiple ways!
It's really time to preserve this pattern by fusing some inexpensive woven interfacing to the back of it! 


This time my hack was the sleeves.  I decided I wanted flutter sleeves for this floaty fabric!  

Did I say it it SEW soft!!!

My Kai Scissors worked magically on this fabric!


After ensuring that I had the dark blue flower placed the same way on each of the flutters, I discovered this cut in my fabric!!  

NOOOO! 

I have no idea how or when it happened!
Not only was I shocked, I was upset! I'd spent so much time making sure the flowers were placed nearly perfectly on the top as well as the sleeves!

I took a really deep breath and walked away! 

A word of advice: Don't sew when your'e frustrated, upset or tired!


After 2 days of thinking about it, I decided to mend the hole by hand.  

Because the back of the fabric is a bit "spongy" - I decided that hand stitching
was the way to go! 

 After stitching it, I steamed it and used my clapper on it.  It's not perfect, but it will be hidden in the flutter when I wear it!  So I'm kinda happy with the repair.


I did most of the construction on my Juki MO 1000 Serger.

I stabilized the neckline, sleeve hem and body hem with a strip 
of fusible tricot interfacing that I cut myself.  

Don't skip this step!

I was out of it, but you can also use fusible Dritz Stay Tape.

After adhering the strips of interfacing, I  serged the edges - then top stitched a 1/2" hem.


I used Dritz Clear Elastic on the shoulder seam (which I prefer for knits).

  Another step you don't want to skip!

 You don't want to do all the work of creating a beautiful garment only to have your shoulders losing shape and sagging!


I'm quite happy with this top...I might even forget about that cut in the flutter!  LOL!


Happy Endless Sewing!


Online Class Registration


 Don't forget to "follow" me! 😍


Don't want to miss a blog post? Sign up for email notices.


Tuesday, August 6, 2019

Wrap Pants - Camo Style

This post may contain affiliate links. This means that if you click through and make a purchase from these links, I may earn a small commission at no extra cost to you.

These camo print wrap pants - yes pants - were sew much fun to make
and even more fun to wear! 

They feel like a maxi skirt and secret pajamas all at once!

I'm in love!

💓💓💓


And I love it with my self drafted cold-shoulder hi/low top!

y

There are many video tutorials out there for these wrap pants. 
But, I chose the You Tube tutorial by my sewsister, Tree - of Stiitchless TV. 
Click here for her video.

 These pants are truly zero waste! Your scraps become the ties!


To wear them you tie the front 1st, then pull up the back and tie again.  
Of course you can use buttons, snaps or even hook and loop tape to fasten your pants, but for those times we need a bit more room in the waist, believe me - ties are better! 


There is only one seam - the crotch seam - just one!  
Of course I used my serger on this lightweight knit fabric.
Chiffons, challis, linen blends, cotton, rayon and medium weight knits will work as well.

The sides and bottom only need a narrow hem.  I'd suggest that you hem the bottom 1st (as Tree discovered).

I had to put my label in as soon as I stitched the crotch seam, because I didn't use notches yikes). 

And even though my front crotch is smaller than my back crotch (go figure) I would not have known the front from the back once they were stitched together!  LOL!


Once the bottom and sides were hemmed, I added the waistband - which included the ties.  I pressed the band in half lengthwise - to prevent crazy shifting.
I centered the waistband on the front and stitched it from side to side. 
I then sewed the ties from one side to the other, turning under as I sewed. 
I repeated the same steps for the back.


I made a cotton muslin (woven) first.  
As suspected, it opened on the side from the hip down when I walked.
Flashing is not good!  Hahahaha!

But the lightweight knit worked sew much better - the sides only opened from just below my knee.
No flashing, right! Yay!


I love how it flows and how the wind picked it up and how comfy it is!  
I was thinking to buy more of this fabric and make a maxi skirt, but these pants also fit the skirt bill!  

Did I say that I'm in love with it!
💓


💓💓💓


Photo Cred:
Kari Bozeman
@karebearbozeman


Happy Endless Sewing!


Don't want to miss a blog post? Sign up for email notices.


Saturday, June 15, 2019

One Pattern 2 Ways

This post may contain affiliate links. This means that if you click through and make a purchase from these links, I may earn a small commission at no extra cost to you.

I AM IN LOVE!  


I've had this McCall's 7348  pattern for a few years, but recently pulled it out when I decided I wanted a quick make for Mother's Day.  
Yes! I made it the night before!  

Why do we do this to ourselves?  This time my excuse is that I was buried in Prom and Graduation makes!

But, I'm so glad I decided to make it at the last minute!
Why? 
Because I didn't have time to go through ALL of my stash to find a piece large enough in a color I wanted to wear.  I knew I had 6 yards of this coral ITY knit that I purchased years ago from the warehouse we affectionately call "2121".


I made view D with the sleeves from view C. 
It came together very quickly! 
I did not need to make any measurement adjustments at all!  
That is an anomaly - as I usually have to make fit adjustments on commercial patterns!

I did all of the construction on my serger.  I didn't have thread in this beautiful coral color, so I did what I normally would do...I blended a few colors to make it work!


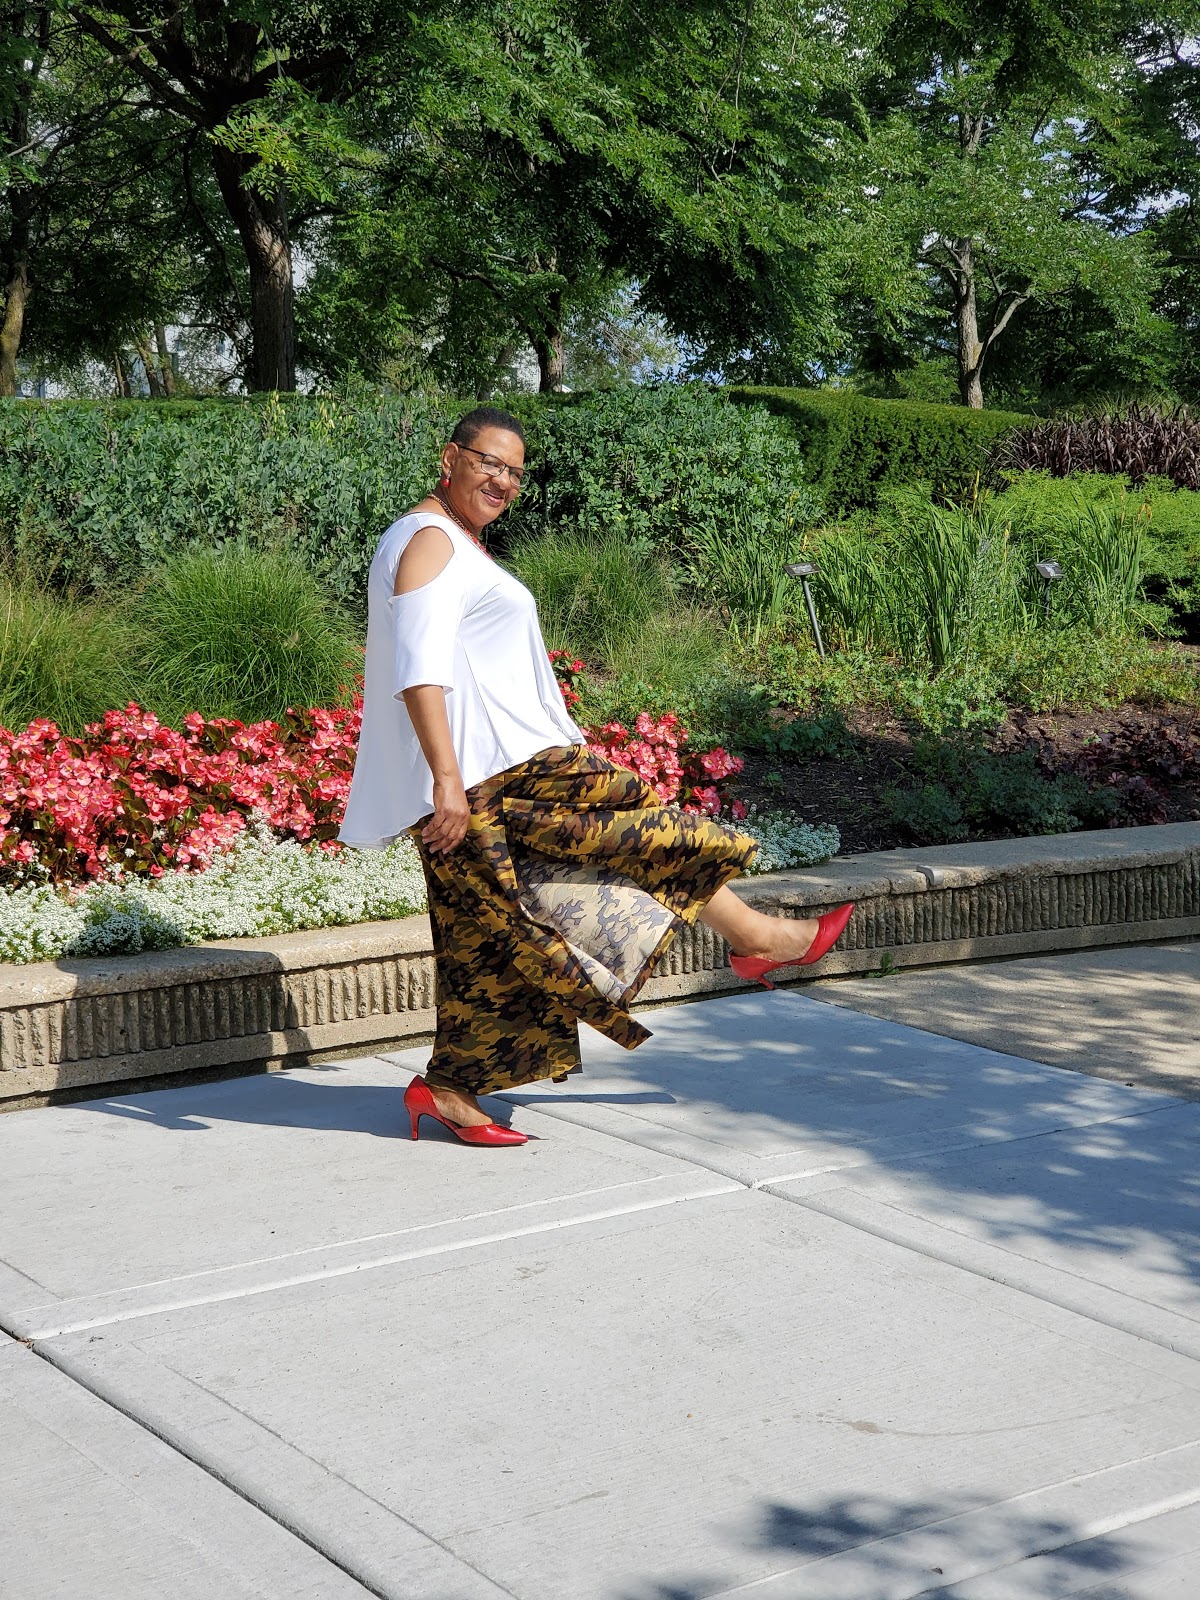
Before I added the sleeves, I got out my heels and tried it on!  

I WAS IMMEDIATELY IN LOVE!

I walked around in it about 10 minutes!  

Yes! There is absolute joy in sewing for yourself!
  This was one of those moments!  I loved the fit, the flow, the drape and how it made me feel!


I added and hemmed the sleeves finished the neckline. 
But my serger decided it did not want to do a narrow hem, and I needed to get some sleep, I decided to leave the bottom raw.  
I cleaned up my slightly imperfect scissor cuts with my rotary cutter and I was done! This was my first time doing a raw hem.  I'm still not sure how I feel about it!  Time (and fabric type) will tell if I do it again.


This top/dress even looks good on the hanger! 😍 Look at that drape!


SEW!
I made it again! 

I bought this beautiful ITY from Vogue Fabrics earlier in the spring. When I saw it, I had no idea what I'd do with it, but after making the coral piece, I knew it would work for the pattern...and for another special occasion...my Grandheart's Graduation!


I laid it on my cutting table to take a look at the direction and area of the print, because I knew I'd have to "mirror" the pattern to insure the print matched.

I laid out and cut the back piece 1st.  When I attempted to lay out the front piece, I realized I did not have enough fabric to use in the same direction as the back.

Sew, I flipped the direction of the front pattern piece. After moving it around a few times, I decided that I wanted the smaller print at my neckline and the solid black at my waist.


Again, when I tried in on, I was in love with the outcome!

I really love how this print drapes on my body!
  Sexy!  I can say that, right? 

Again I used my serger (4 thread set up) to construct this one.


Of course, things don't always go as planned when making garments.  
But I'm happy that this time it only running out of thread on the spool of thread I was using to hem it.  I only needed about 3 more inches of stitches to finish it.  Sew out came a new spool and I finished it!
No raw edges on this one!


I narrow hemmed it with the lighting bolt/wobble stitch which stretches with the garment...no future popped stitches!

Finished the neckline and added my label!


I am happy and proud to say that my dress/top was featured by
 Judith Rosalind of the Instagram @sewover50 hashtag...which has over 12, 000 followers! 
This was quite the surprise and an honor!


I actually don't know which I like better, the back or the front!  I do know that I love the way I look and feel when I wear it!


And...I've taken a few orders for it!  Of course not in the same fabric!  LOL!


Sew!

I am definitely making another one! 

How often have you used the same pattern to create a new look by simply switching up the print and/or fabric?

Happy Endless Sewing!


Don't want to miss a blog post? Sign up for email notices.  


Let's Make and Wear a Kaftan

This post may contain affiliate links. This means that if you click through and make a purchase from these links, I may earn a small commiss...