Friday, September 29, 2017

Adventures at the Original Sewing and Quilt Expo

Original Sewing and Quilt Expo Adventures

Yesterday (Thursday) I attended the Original Sewing & Quilt Expo in Illinois at the Renaissance Convention Center. It was a blast of a day and sew fitting (pardon the pun) that it was held here during National Sewing Month!

I was able to meet up with Angela Wolf.  We spent some time chatting and I attended her Jacket Embellishment class and picked up a lot of great tips. She is such a great instructor!

I also finally had the opportunity to meet Rhonda Pierce from Schmetz Needles in person...we'd been chatting back and forth on Facebook for a while, but yesterday we finally met!  She is a wonderful and joyful person!

And...I also met 2 people from my Facebook Group Endless Sewing with Carrie, May Murdoch and Barbara Murray.  Barbara, we forgot to take a picture. 😞

I participated in the Sew News and BurdaStyle "Sewing Mad Libs Relay".  This was completely unplanned for me, but I couldn't resist it - the key word was "contest"! So, me and my competitive spirit joined in!

Ellen March and Meg Healy from Sew News and Burday style lead this fun relay sewing project.  In the pics below are the "clues" to design the project.  I had the last 2 clues and 30 minutes, which were to add fringe and sparkle. I decided to tie in the pocket fabric (which Meg and I cut into fringe) and Meg added hot fix crystals to the pocket trim! And TADA! We were done...in 26 minutes!  SEW FUN! 


Looks like we also created a bit of a mess on the table!  LOL!

This was my prize package for participating:


Of course there was shopping! Vogue Fabrics has the most amazing display of fabrics.  I met a lot of new friends there! 😍


This is part of my fabric haul!  Yummy fall fabrics!  What to make first??


What are you doing/sewing for National Sewing Month?


Tuesday, September 19, 2017

Kimono Acid Washed Duster

Kimono Duster


This Kimono Duster was sew fun to make!  The only problem was tracking down this Modal Rayon fabric! LOL! I purchased it from Joann's, but I had to go to 3 stores over a 2 week period before I could find one continuous 3 yard piece. It seems to be quite popular!

I used Simplicity's Cardigan pattern # 8377: link here

But I hacked it a lot more than the pattern suggests:

* I used the medium length (the view with the pleat in the back) but cut it much longer as I wanted it close to floor length.
* I did not cut a set-in sleeve - I cut a kimono style sleeve extended from the shoulder - so I ended up with 2 pattern pieces - front and back.
* I rounded the bodice front more -  just because I wanted to!  LOL!
* Oh! And I rounded the hem as well!
* I finished the side seams - (including inside the sleeves) with French seams, as I really didn't want any seams to show.
* I did not use the facing - because I did not want the weight of it - I really wanted this Modal Rayon fabric to remain light and airy. Instead, after much thought about the finishing and color, I opted for black packaged bias binding - I am sew, sew glad I did! I love the outcome!


Then I simply paired it with a re-fashioned men's crew neck t-shirt, straight leg jeans and black heels. No, No, not high heels, just heels! 😄  More on the t-shirt in a later blog! Isn't it fun to be able to create and recreate clothing! 💓


I really do like the pleat in the back!


And I love the flowiness of this completed duster! I will definitely make a few more!

Photo Creds: My Granddaughter, Charlysse: Enchanted Photos
Follow her on Instagram

Now...on to the binding!

I used 2 packages of 1/2 inch double fold bias binding. After joining the 2 pieces from the packages together, I simply inserted the edge of the duster inside the binding and used a straight stitch. I started with about a 10 inch tail...you will need this when approaching the end.

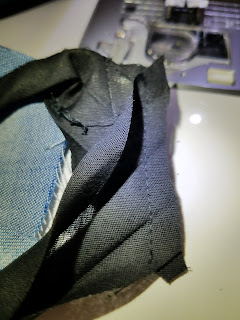
Take a close at your packaged binding. You will see that one side is slightly wider than the other.  I placed the wider side on the wrong side and stitched from the right side. This ensures that the bottom of the binding will be "caught" when stitching.  Take a peek at the wrong side periodically to ensure you are stitching both sides.


When I get about 6 to 10 inches from the end, I stop and overlap the 2 ends. The key is to overlap them the same width as the binding. So if your binding is a total of 2. 5 inches wide (when opened), you will overlap the the 2 ends 2.5 inches


The next step is to double check your measurements, take a deep breath and cut off the excess. Or you can choose not to breathe and leave the excess for insurance.  It's really up to you!  😊

Join the 2 pieces in a "T" formation and stitch at a 90 degree angle. Joining the binding at a 90 degree angle will reduce bulk at the seams.

Notice, for this demo, I did not cut the excess...I actually had too many distractions going on that day and did not want to have to do it over.

But alas...I did cut it! 
But only after I made sure I'd sewn it accurately! 


Then I folded the binding over the rest of the hem and completed the stitching.  I used the same steps for the sleeve hems!


I'm SEW, SEW happy with the results!


Don't forget...it's still National Sewing Month! What are you sewing?

As always, comments and questions are always welcome!


Thursday, September 7, 2017

Summer UFO


Summer UFO

I found this year-old self-drafted UFO in my sewing room as I was moving to the larger space (I think I can call it a studio now). 😊 Because it was from a year ago, I needed to alter the side seams - then I only needed to attach the sleeves and finish the hems. It was a quick project and I was able to wear it the next day!

The fabric is a semi-sheer polyester with a bit of spandex in it. I don't remember where I purchased it, but it may have been part of my Hancock's Fabric stash (who has since gone out of business).

This top is perfect for these last days of summer!


The hems (neckline, bottom and sleeves) were finished with a narrow hem. I really wanted to finish the neckline with fold-over elastic, but out of all the colors I have, I don't have white or this tealish color! Sigh!

Moving on...
To make the narrow hem: 

I serged the edges first with a 4 thread set up.

Then I folded the edge along the serged stitches and ironed the seam - the serged edge rolls over beautifully and eliminates measuring. We all love that, don't we? 😊  By the way, I love using my clapper to hold those folds in place.

I then folded the edge once again - and of course pressed again - and used my clapper.


The last step was to top stitch. You want to top stitch from the "top" of the garment (right side). I can do so by feeling for the edge to start, then using the guides on my face plate to keep it straight as I sew.

If you need to, you can mark your stitch line - just make sure your marking tool of choice is removable, I like Flexion pens,but recently tried and like this pen by Maderia, which I purchased here: 
http://www.sewingpartsonline.com/magic-pen-madeira.aspx

And Tada! I was done with my UFO!  Who doesn't like quick, easy projects! ❤


I hope this helps you to understand one of the many ways your garments can be finished - and that you are inspired to finish those UFOs.


Happy Endless Sewing!

Don't forget that September is National Sewing Month! I'd love to hear about your sewing adventures!


     I welcome your comments and questions and invite you to visit often for sewing tips and tricks!


Coming soon: Online Sewing Classes

Let's Make and Wear a Kaftan

This post may contain affiliate links. This means that if you click through and make a purchase from these links, I may earn a small commiss...