Showing posts with label dress. Show all posts

Friday, April 14, 2023

Let's Make and Wear a Kaftan


This post may contain affiliate links. This means that if you click through and make a purchase from these links, I may earn a small commission at no extra cost to you.

This was a fun make! I love the ease of making it, but I love wearing it as well!


I did a sew along on TIKTok (yep, I said TikTok) with a talented group of sewist and designers!  That made it even more fun! The talent is certainly there, but the hilarity often takes over - and I love it!! 
So much love, laughter and serious sewing!
The group is @blacksewing network. It was created by Carmen who has 2 handles:
@cagthemag on TT and @CAGReinvented Blog on FaceBook.

The patterns that were used are Simplicity 8877 and Simplicity 8911

They both required a good bit of fabric and because I'm still on a fabric fast - I couldn't find a piece from my stash that was long enough - soooo - I self-drafted a pattern that only has 2 pieces and used less fabric. That piece was not quite long enough to make it floor length.  So I decided to make it a bit shorter in the front and floor length in the back! 
I decided to use packaged bias binding for the neckline. 

Us creatives will always find a way to make it work!

The fabric is a drapey mystery poly blend snake print with a sprinkling of silver flecks.

I haven't decided if I will wear it outside, but I'll  definitely be swishing around the house in it!
It is SEW comfy!


Wednesday, April 21, 2021

Tunic! It's All About the Flutter!

This post may contain affiliate links. This means that if you click through and make a purchase from these links, I may earn a small commission at no extra cost to you.

 Open Front - Flutter Tunic!


I've had this Vogue Pattern #9305 for a few years, but never felt like I had just the right fabric for it.

Then along came this beautiful gifted fabric from Minerva.com and I knew it would work! The fabric is Diamond Dobby and is textured polyester suiting.

I love the silver-grey color and the tiny diamond shapes that are woven into the fabric.  It gives it a kind of monochromatic vibe!


I love this open front - flutter tunic...but I certainly won't be wearing it without leggings!


Who says we can't wear leggings after a "certain" age?  

They work perfectly with this tunic, and I didn't think the included pants would be flattering with it.

Sew...leggings it is!


As always, I hacked the pattern.  😉  I reduced the height of the neckline - high necklines are just not flattering on me. I shortened the sleeves by 5 inches (yes...5 inches) and lengthened the side split by about 3 inches...even with leggings, it was a bit too high -  so down it came! 

I also added a bit of shaping to the waist area.  The pattern called for a back zipper, but after lowering the neckline, I was able to eliminate it.

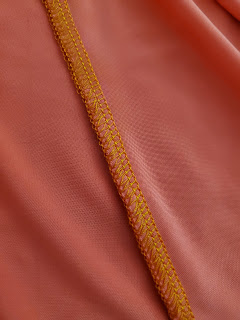
I chose to use fusible stay tape versus stay stitching the neckline.  After fusing the tape to the wrong side of the neckline, I serged it with a 3/8" finish using a 3-thread set-up.  The curve was then clipped and turned under and top-stitched. 


I also used the same technique for the hem.  


This dress is quite versatile...easy to wear...dress it up or down.  Flats or heels both look great with it! Wear jeans instead of leggings...or be bold and leave the leggings and jeans at home! 

It would also be a really nice swim suit cover up! Try a knit or a woven with some stretch. Use a solid or a bright or subtle print.  I'll be using a bright print knit for my next one. Yes! I'll make it again!  


How would you style this tunic?


Tuesday, January 5, 2021

Minerva ITY Knit - Wrap Dress

This post may contain affiliate links. This means that if you click through and make a purchase from these links, I may earn a small commission at no extra cost to you.


Once again I've used fabric that was gifted to me from Minerva.com in exchange for a blog post!

This ITY knit is the perfect fabric for a wrap dress...which I've never made or worn before. 
I love the print!


I chose McCall's 6884 - view C - which has been in my stash for quite a while. 


  I was never sure how this style would look on me. But once I tried it on and made a few adjustments, I loved it SEW much that I didn't want to take it off!

Adjustments were interesting! 
Because I'd never made or worn this style of dress, I wasn't sure where to start. 

In the end, I really only needed to reduce the width of the under panel.  I gradually cut it until I'd removed about 3 inches. Of course I had to try it on each time until I was happy with it. This took a while, but it was worth it.  

I'm wearing a camisole underneath so that I'd be covered - if I happened to bend over.
I'm very happy with the outcome and the fit! 


I'm wearing my Mom's pearls with it.  I think she'd love the look as much as I do!

Most of the construction was done on my serger.  All hemming was completed on my sewing machine.


As always, with ITY knits...I used a fusible knit stay tape on the shoulders, neckline, hem and sleeves.  It stabilizes those areas, which extend the life of the garments.


I used a narrow (lightening bolt or wobble) stitch to hem the sleeves and bottom of the dress.


The pattern doesn't call for it, but I added a snap to the inside to ensure that the inside panel doesn't fall below the outside...I wanted to keep the hem even...even when I'm moving.


This is now one of my favorite dresses!  
I will definitely make it again...and I'll stick to using knits for it.


Tuesday, November 24, 2020

Minerva ITY Knit

This post may contain affiliate links. This means that if you click through and make a purchase from these links, I may earn a small commission at no extra cost to you. 

Minerva ITY Knit


This beautiful print ITY knit has so many of the colors I love! I was thrilled when it arrived at my door!  It is even more beautiful in person!  It was gifted to me by Minerva.com in exchange for a blog post.


Because of the print, I decided to go simple.  I love hi/lo tops and dresses, so I used one of my TNTs - McCall's 6957 - view B.  I love the fit and flare shaping of this pattern!

The only change I made was to add sleeves.  I love elbow length sleeves.  Many of my TNT patterns are marked with that length.


I did a bit of print matching by making sure the aqua floral was center front and that the sleeves matched. Most of the construction was done on my serger with a 4 thread set-up.


I love using pre-cut fusible stay tape on the shoulders, hems and necklines of my knits.  After fusing the tape on, I serged the edges using a 3 thread set-up.  Then I simply pressed the hem under by using the stitches as a guideline and top stitched.


Here I styled it with leggings, but it's actually long enough in the front that I can also forego the leggings. I wore it to an outdoor setting, thus the flats, but it can also be styled with heels! 


Of course I couldn't resist making a matching mask. To stabilize the knit for the mask, I fused a tricot interfacing to it.  The lining/filter pocket is 100% cotton.


This dress is easy to make and fun to wear!  

Did I say that I love sewing and wearing ITY knits! 😃 


Don't want to miss a blog post? Sign up for email notices.


Saturday, June 15, 2019

One Pattern 2 Ways

This post may contain affiliate links. This means that if you click through and make a purchase from these links, I may earn a small commission at no extra cost to you.

I AM IN LOVE!  


I've had this McCall's 7348  pattern for a few years, but recently pulled it out when I decided I wanted a quick make for Mother's Day.  
Yes! I made it the night before!  

Why do we do this to ourselves?  This time my excuse is that I was buried in Prom and Graduation makes!

But, I'm so glad I decided to make it at the last minute!
Why? 
Because I didn't have time to go through ALL of my stash to find a piece large enough in a color I wanted to wear.  I knew I had 6 yards of this coral ITY knit that I purchased years ago from the warehouse we affectionately call "2121".


I made view D with the sleeves from view C. 
It came together very quickly! 
I did not need to make any measurement adjustments at all!  
That is an anomaly - as I usually have to make fit adjustments on commercial patterns!

I did all of the construction on my serger.  I didn't have thread in this beautiful coral color, so I did what I normally would do...I blended a few colors to make it work!


Before I added the sleeves, I got out my heels and tried it on!  

I WAS IMMEDIATELY IN LOVE!

I walked around in it about 10 minutes!  

Yes! There is absolute joy in sewing for yourself!
  This was one of those moments!  I loved the fit, the flow, the drape and how it made me feel!


I added and hemmed the sleeves finished the neckline. 
But my serger decided it did not want to do a narrow hem, and I needed to get some sleep, I decided to leave the bottom raw.  
I cleaned up my slightly imperfect scissor cuts with my rotary cutter and I was done! This was my first time doing a raw hem.  I'm still not sure how I feel about it!  Time (and fabric type) will tell if I do it again.


This top/dress even looks good on the hanger! 😍 Look at that drape!


SEW!
I made it again! 

I bought this beautiful ITY from Vogue Fabrics earlier in the spring. When I saw it, I had no idea what I'd do with it, but after making the coral piece, I knew it would work for the pattern...and for another special occasion...my Grandheart's Graduation!


I laid it on my cutting table to take a look at the direction and area of the print, because I knew I'd have to "mirror" the pattern to insure the print matched.

I laid out and cut the back piece 1st.  When I attempted to lay out the front piece, I realized I did not have enough fabric to use in the same direction as the back.

Sew, I flipped the direction of the front pattern piece. After moving it around a few times, I decided that I wanted the smaller print at my neckline and the solid black at my waist.


Again, when I tried in on, I was in love with the outcome!

I really love how this print drapes on my body!
  Sexy!  I can say that, right? 

Again I used my serger (4 thread set up) to construct this one.


Of course, things don't always go as planned when making garments.  
But I'm happy that this time it only running out of thread on the spool of thread I was using to hem it.  I only needed about 3 more inches of stitches to finish it.  Sew out came a new spool and I finished it!
No raw edges on this one!


I narrow hemmed it with the lighting bolt/wobble stitch which stretches with the garment...no future popped stitches!

Finished the neckline and added my label!


I am happy and proud to say that my dress/top was featured by
 Judith Rosalind of the Instagram @sewover50 hashtag...which has over 12, 000 followers! 
This was quite the surprise and an honor!


I actually don't know which I like better, the back or the front!  I do know that I love the way I look and feel when I wear it!


And...I've taken a few orders for it!  Of course not in the same fabric!  LOL!


Sew!

I am definitely making another one! 

How often have you used the same pattern to create a new look by simply switching up the print and/or fabric?

Happy Endless Sewing!


Don't want to miss a blog post? Sign up for email notices.  


Let's Make and Wear a Kaftan

This post may contain affiliate links. This means that if you click through and make a purchase from these links, I may earn a small commiss...